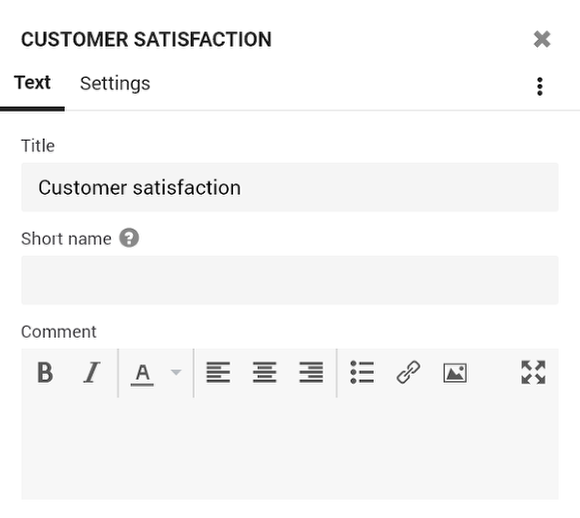
The text & media element type is used to add a heading or free text to a survey report. You can also add tables, images and videos. The element auto-grows to any height so you can add as much text and images as required.
- Edit an existing report or create a new report.
- Add an element or click on the Text element that you wish to edit.
The properties pane will open on the right-side of the screen.
Text
- Title: the heading or title of the element. You can optionally hide it.
- Short name: by default the title of an element is used in the element list (table of contents) on the left side of the report. If the title is quite long, it will get cut off in the list. In that case, enter a short name here and it will be used in the element list instead. The short name is also shown at the top of the properties pane.
- Comment: the body text of your element. The area provided to type is not large in the properties pane. Click on the
 expand button to get a larger work area. You will also see a lot more options on the toolbar including tables and the Variables drop-down. You can also use our scripting language to add calculations or show different texts depending on values in the element and report.
All of the edits that you make will be visible in real-time in the element itself the View Area.
Style
- Width: Set the width of the element to the full report width (100%), only half of the report screen, one third, etc.
- Title: Show or hide the title at the top of the element.
- Comment: Show or hide the comment in the report. Hiding the comment from the report lets you use it for internal information that’s not shown in the report itself.
- Custom CSS class: use this in combination with the Report Style options to further customize the look of this element.
- Custom text style: change the font, size and alignment for the different parts of this specific element.
Tip: if you wish to apply a different font, size or alignment for the entire report, use the Global Style settings for the report instead found by clicking on the cogwheel at the top right of the report. - Custom element style: tick this box if you wish to use a background color and/or border color that’s different from the report style. If you wish to apply this style to the entire report, use the Global Style settings for the report instead.
Differentiated content
Sometimes in a report, you want to show different content depending on the results of the survey. This is often the case if you will be creating shares for different groups in your organization using share filters.
Let us use an employee satisfaction score on a scale of 1 to 10 as an example. You will produce a department level report that you will then share with each department with the data filtered to only show their department and a benchmark of the whole company.
Given the above situation, you would like to include a section in your report with tips for departments with a score that is lower than the benchmark. We call this a Gap analysis. The gap being the difference between the benchmark and the score of the department. We do not want to show the tip to departments with a higher score than the benchmark.
To do this, we will need to put on our Aristotle caps and use the CheckMarket Scripting Language (CSL).
Don’t worry, it looks harder than it is and once you get used to the syntax, you’ll love working with it!
A good trick is to write down what you want to do in words before you translate it into CSL. So, let’s crack our knuckles and give it a try:
“If score is less than benchmark then show tip.”
Now what does that look like in CSL:
{{#if (lt report.elements.id-1.statistics.1.avg report.elements.id-1.statistics.2.avg)}}
Tip text goes here!
{{/if}}
Some translations:
- lt: ‘less than’. We want to check if the first value is lower than the second value.
- report.elements.id-1.statistics.1.avg: This is sort of a cascade from the top so read this as, Report > Elements > Element with id ‘1’ > Statistics > First Data Source > Average.
- report.elements.id-1.statistics.2.avg: Only difference with the first item is the ‘2’ which means the second data source, in this case the benchmark.


Leave a Reply